


News items
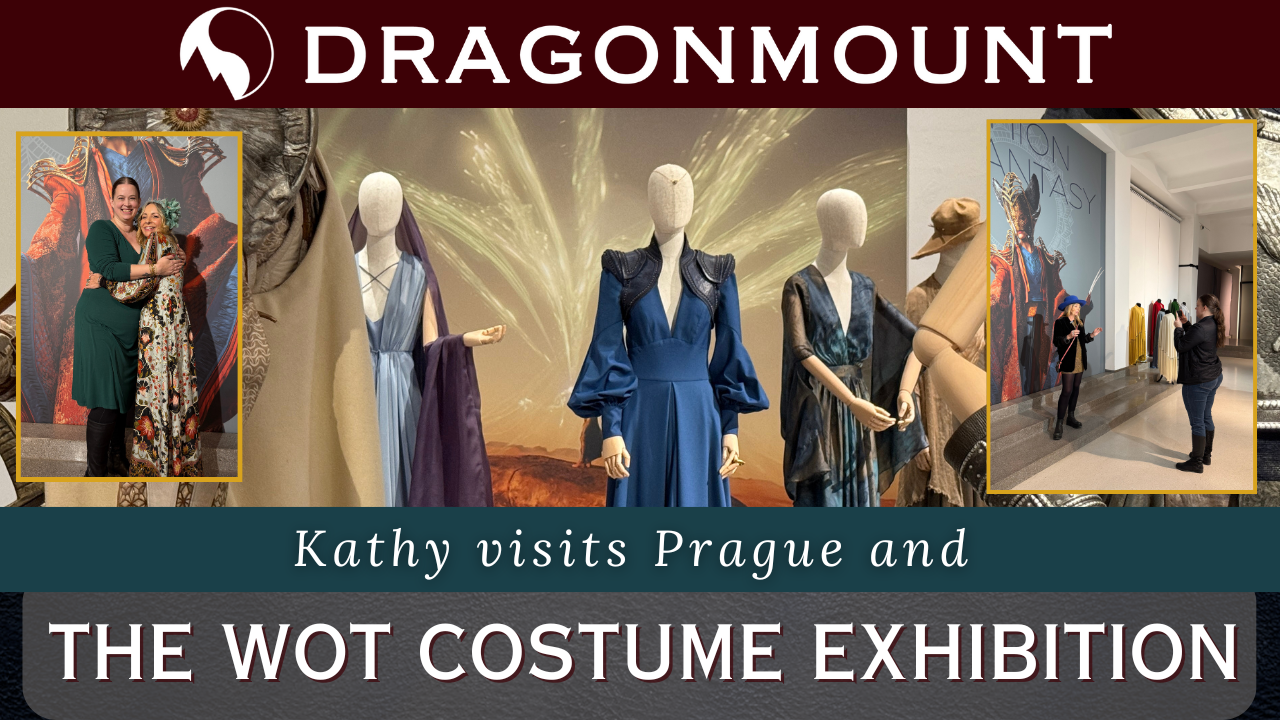
The Wheel of Time costume exhibition at Prague's Galerie Manes showcases over 80 breathtaking costumes, offering an unprecedented look at the intricate craftsmanship behind the show.
Read More...

Studio Ghibli is currently in the middle of a film festival, showing one of their classic anime movies each month. This Studio Ghibli Fest is occurring at select theaters all around the country. So far, they’ve shown My Neighbor Totoro, Kiki’s Delivery Service, Castle in the Sky, Nausicaä of the Valley of the Wind, and this month’s addition will be Spirited Away. Spirited Away is one of my favorite anime films—and one of my favorite movies too. I love the themes of bravery, perseverance, and the ability to see one’s soul instead of their physical body. It’s a wonderful tale, and has so many beautiful characters. The growth of Chihiro as the movie progresses is phenomenal. She starts out so sheltered and winds up confident and capable. And Haku is my favorite male within the Ghibli universe. He’s amazing! Plus the fact that he’s a dragon makes him the best in my book! In preparation for seeing the movie on the big screen, I wanted to try to craft a Haku scarf. I followed this tutorial, which was pretty easy. Materials needed: About 1/2 yard of white fleece About ¼ yard of blue fleece Fleece scraps in yellow, black, pink, gray, and brown Iron on fabric adhesive Optional: stuffing Cut out the pieces This is the hard and boring part, but oh so necessary. I put on music, or an audiobook, which helps keep my mind occupied during the arduous task. Sew the head I loved that this part was done first. It let me see Haku’s adorable face which really motivated me to finish the project. You can sew the eyes and nose on, but I used an iron on fabric adhesive. Much quicker and gives it a nicer appearance. Sew the body This part got kind of tricky. I had to sew the back ridges into the body like a sandwich. Plus it’s so long, it felt like I was sewing forever. Sew the tail This was also tricky to sew because of the points and ridges. But since it was small, it wasn’t a big issue. Stitch them together I hate sewing by hand. I’m terrible at it, and I can’t hide the thread the way the tutorials show me. I’ve never gotten the hang of it. So, my stitches are visible and clumsy, but I got a Haku in the end! Stuff it? The original tutorial made a scarf. But as soon as I was finished, I thought it was such a wasted opportunity. Why have a scarf when you could have a ginormous Haku plushie? So I used a ton of polyfil and stuffed my dragon. This was the hardest part, getting the stuffing all the way up his body. It probably took me thirty to forty minutes. I was using every device I had to get the fluff up his butt. In the end, it was worth it! The finished Haku is beautiful and so cuddly! I can’t wait to wear my Chihiro casual cosplay outfit, wear Haku around my neck, and see this movie on the 30th of October. For next time, I might make something to accompany me to the showing of Howl’s Moving Castle. Stay tuned, and thanks for reading!
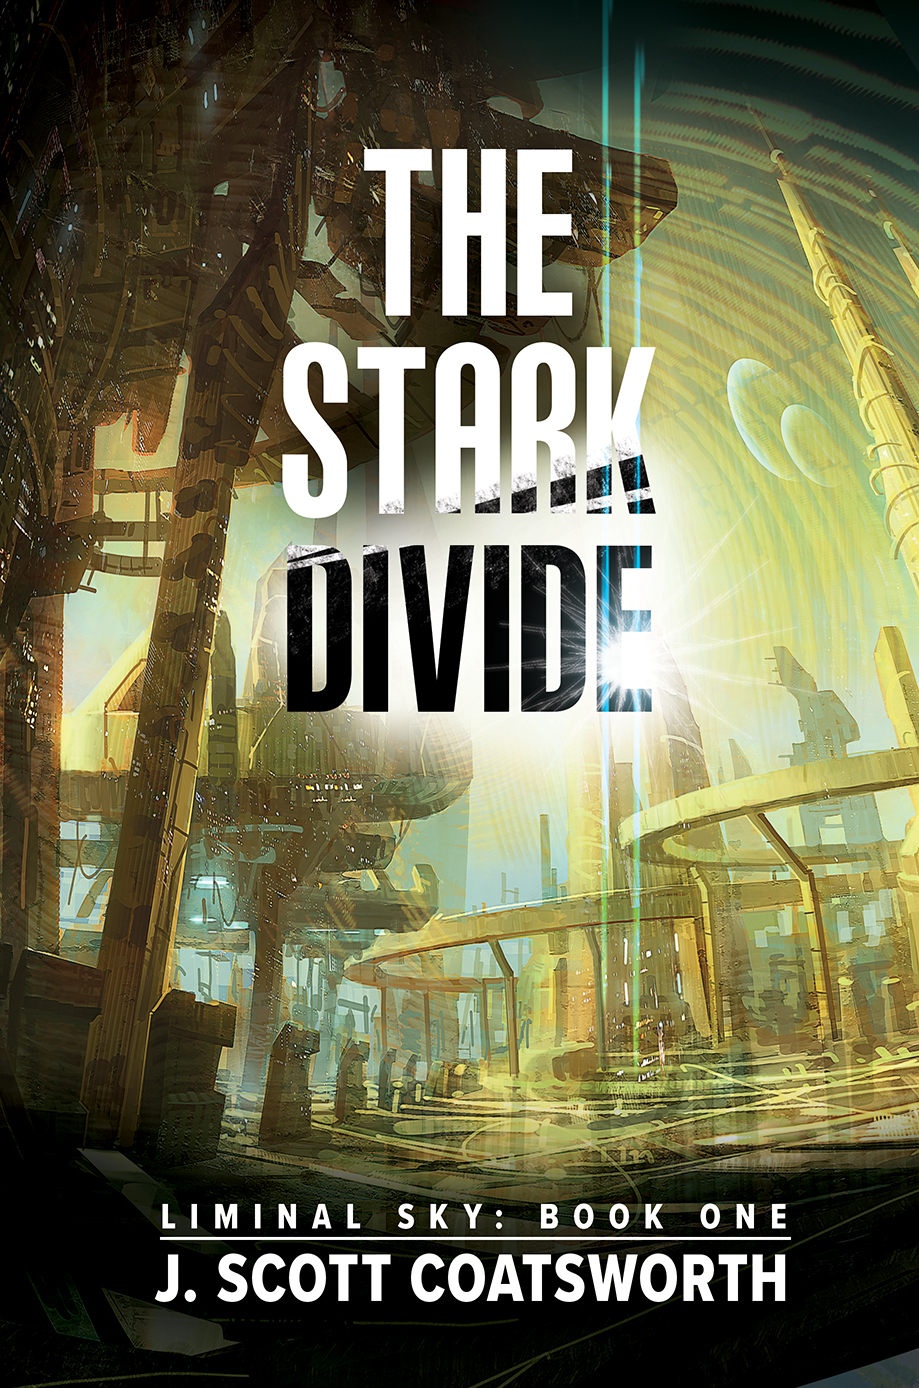
I was excited to get to speak to J. Scott Coatsworth about his newly released sci-fi novel, The Stark Divide. The book was enjoyable, and I was eager to delve further into what its author had to say. You can read my review of The Stark Divide here. Slight spoilers will follow. Q: The cast of the series is quite diverse, in terms of age, gender, nationality, and sexual orientation. I like that it suggests a uniform front in the future, people willing to work together regardless of their background or lifestyle. Was that a theme you wanted to emphasis? Hmmm, that’s a great question. I’m a fan of golden age sci fi, when things were a little simpler. And while I sometimes like things dark and complicated, sometimes I’m in the mood for Star Trek. I was a Superman fan as a kid - I loved that he was true and strong and good, and for that reason I absolutely HATED Batman vs. Superman. We’r going through such a dark period now that I want to believe, have to believe that at some point, some of us will find a way again to pull together for the common good. So yeah, I guess that does come out in the book. Q: The story also spans the course of 30 years. How difficult was it to storyboard or brainstorm the steps for the evolution of Forever? Can you tell us how far into the future the series will reach? The Stark Divide is actually the second book in the series. The first one was written more than twenty years ago, and was never published. In the current timeline, it would take place a few hundred years after this part of the story. I sent it off around 1995 to ten big publishers - it took a year, but the last rejection came in, and I pretty much gave up writing for almost twenty years. When I came back to writing in 2014, I decided to go back in time and figure out how the world came to be. It started with a novella that eventually became Seedling, the first part of the novel. I’m writing another sci fi series - Skythane - that’s told in a more traditional one story format, so doing The Stark Divide in a three-story epic format has actually been a lot of fun. Each story can stand alone, but they share characters, and allow me to telegraph the story over a long period of time. It’s exciting to see how things shift each time, as a decade or two passes. The current trilogy will cover a hundred years, give or take. But I hope to eventually take it all the way across the stars, to mankind’s new home - maybe 300-400 years in all. Q: Did you find it difficult with these jumps in the timeline? Or was it easy to let the reader conclude the natural steps between without it being shown in the text? I think in most cases it should be easy for readers to fill in the gaps. It’s like getting to fast forward and see if the couple you liked really makes it, or if the world comes through the latest challenges and goes on to grow into something new. It’s one of my favorite things about the story. Q: I love the undertone of religious epiphany throughout the piece. First in Hammond’s realization that AI may have souls, and then in the coincidental episodes that lead to Ana’s metamorphosis. Is this important to the plotline of the story arc, or just a detail of the characters? It’s something I didn’t really plan at first. Initially I was going to have the Church be a villain in the first part of the story, but then it took a turn. One of my best friends is a very religious Catholic, but she’s also one of the most progressive people I know. I’m more on the atheist side, but when I asked her for some help on the confirmation process for the story, it made me think. It’s so easy for me as a gay man to make a villain out of organized religion. Not too much later, my husband decided he wanted to go back to church for the first time in more than twenty-five years - a reaction to the growing strife and negativity we are all living through today. I went with him out of solidarity, and we found a progressive church nearby. These two events made me reconsider religion, and realize that it had a place in any future that would spring forward from our present. So I decided to weave religion into the story, and it’s been a fascinating thing to work with. On a side note, the series title, “Liminal Sky,” came out of a sermon Pastor Matt gave in which he used the word liminal to talk about the people on the edges of society. It was the first time I’d ever heard it, and so I looked it up: Liminal 1. relating to a transitional or initial stage of a process. 2. occupying a position at, or on both sides of, a boundary or threshold. It seemed perfect for the time when everything changes. Q: On that same note, Lex seems to be able to anticipate what may happen. Within your world, is Lex a deity? Or is it more the processing of a supercomputer to analyze logical outcomes? Hmmm, I’d never thought of it that way. Lex is not a deity, though there’s that famous quote from Arthur C. Clarke: "Any sufficiently advanced technology is indistinguishable from magic.” And I do play more with the themes of religion and heaven in book two, “The Rising Tide,” which I just finished. Q: Andy’s inherited “dipping” seems to be something similar to magic. With this genetic code being passed onto the next generation, will more and more of humanity be able to bend the world around them? Um, yes… and… kinda? There will be a lot more of it in book two, along with reaching and pushing. :P But by the end, things will shift again. That’s all I can say. Q: The ending is bittersweet. Was it depressing to write, thinking of how easily the world could be decimated? Or is there more a focus on the hope that life will always find a way? A little of both? I gotta say, part of me is ready to blow things up and start with a clean slate. We’ve gone so far down some dark roads that I’m not sure there’s a way back. On the other hand, the Obama years showed me what was possible when good people strive for big things, and I still hold out hope that things will change. Or yeah, that life (and mankind) will find a way. You can purchase The Stark Divide in paperback or ebook here. To learn more about J. Scott Coatsworth, check out his website!

I’m excited that this month’s Fantasy Review is J. Scott Coatsworth’s The Stark Divide, the first in the Liminal Sky series. I was able to get an early copy of this stunning sci-fi tale! Synopsis: In the year 2135 AD, the human race is struggling. To combat the devastation on Earth, a new world is being created. An AI will be merged with a seedling, a ship that will grow from an asteroid and eventually become an inhabitable world. Due to an unforeseen accident, the seedling’s planting doesn’t go according to plan. The three crewmembers do what they must to ensure the new world starts to form. In 2145 AD, the new world, known as Forever, is growing. The first workers are terraforming the land, planting compatible seeds, building sustainable homes. But, Lex, the AI who runs Forever, hasn’t forgiven those who caused the accident so many years ago. When given the chance to meet her maker, Lex shows that though she has been manufactured, she is still capable of very human emotions. Hopefully, forgiveness is one of them. By the year 2165 AD, Earth has reached its boiling point. War, famine, changes in weather. Refugees try everything to flee the dying world and make their way to Forever. But the new world is not so safe as everyone seems to think. Humanity still walks its surface, which means their base nature of greed, envy, and corruption will never be left behind. Pros: This story is very epic in scope, spanning over a thirty year period. You get to see the birth of the seedling, its adolescence, and finally its capabilities of being a host and home for humanity. One enjoyable aspect is viewing the technology as it grows, understanding the process taken to ensure the survival of the human race. It’s a well thought out and logical system. The idea of the self-aware AI is given a different spin in this story. They are seen as if they are a new species, ones with souls and worth. I loved the evolution of Lex as she grew and began to gasp her place within the universe, and her purpose for being brought to life. The details of Forever were intricate. It was easy to picture the terrain and landscape of the asteroid, and so interesting to imagine the aspects that made it unique, like the plants glowing with an ethereal light, powered by the lifeforce of Lex. The concept was exciting. Cons: While each of the three segments of the story were engaging on their own, I wished they could have been more drawn out. The first chuck about the birth of the seedling was my favorite, with a sense of intrigue and suspense. Spending more time with the buildup and the release would have been great. And I wish the rest of the story could have held up that same tension. Conclusion: This story is a great introduction to the series, establishing the measures needed to allow life to survive after Earth. Now that the basics of the world and the people’s plight have been laid out, I hope the next in the series will set a breakneck pace of the evolution of the citizens as they learn to live away from their native homeworld. I’m more interested on the species as a whole, than any focus on one particular human. Rating: 4/5 The Stark Divide will be released on October 10th, and is available to purchase from the publisher in paperback or as an eBook,or from Amazon.

Welcome everyone to the lastest issue of the monthly Roundup! Currently, there are members participating in a re-read of The Wheel of Time. Really, I didn't think I would enjoy it as much as I am. Fortunately, I've found the ability to stay in the present with each chapter, rather than "foretelling" each character's ending thread in the Pattern. There are difficulties that pop up, reading a complex arc of a character as they gradually transform into a different person, due to the developments of the story. The need for paying close attention to the words becomes necessary. At times, I put the books down and integrate what I've just read. I'm aware that there are those that have re-read the entire series multiple times. Why re-read The Wheel of Time? Is it because we wish to mentally "inhabit" the created world of Robert Jordan? Is it because this world is so far reaching and developed? Do we enjoy searching for the "foreshadowing" which Robert Jordan so magnificently integrates into each book? Is it the layers upon layers of stories/hints that can be easily missed? Do we see through the eyes of different characters with each re-read? As I re-read, I ponder these questions. I love the detail with which Robert Jordan created both his world and his characters. There was such depth; I didn't think I could take it all in with one read. I was astounded that in many aspects of this world, women dominate, not only with abilities but in other areas as well. The first read, my focus was centered on the White Tower and Aes Sedai. Reading along now, I'm more centered on Mat, Perrin, and the Aiel, along with some of the other characters and how they evolve. In conclusion, I've found The Wheel of Time is re-discovered with each reading. There never will be a time like the first, but don't let that hinder you from picking up the books again. New discoveries await you.
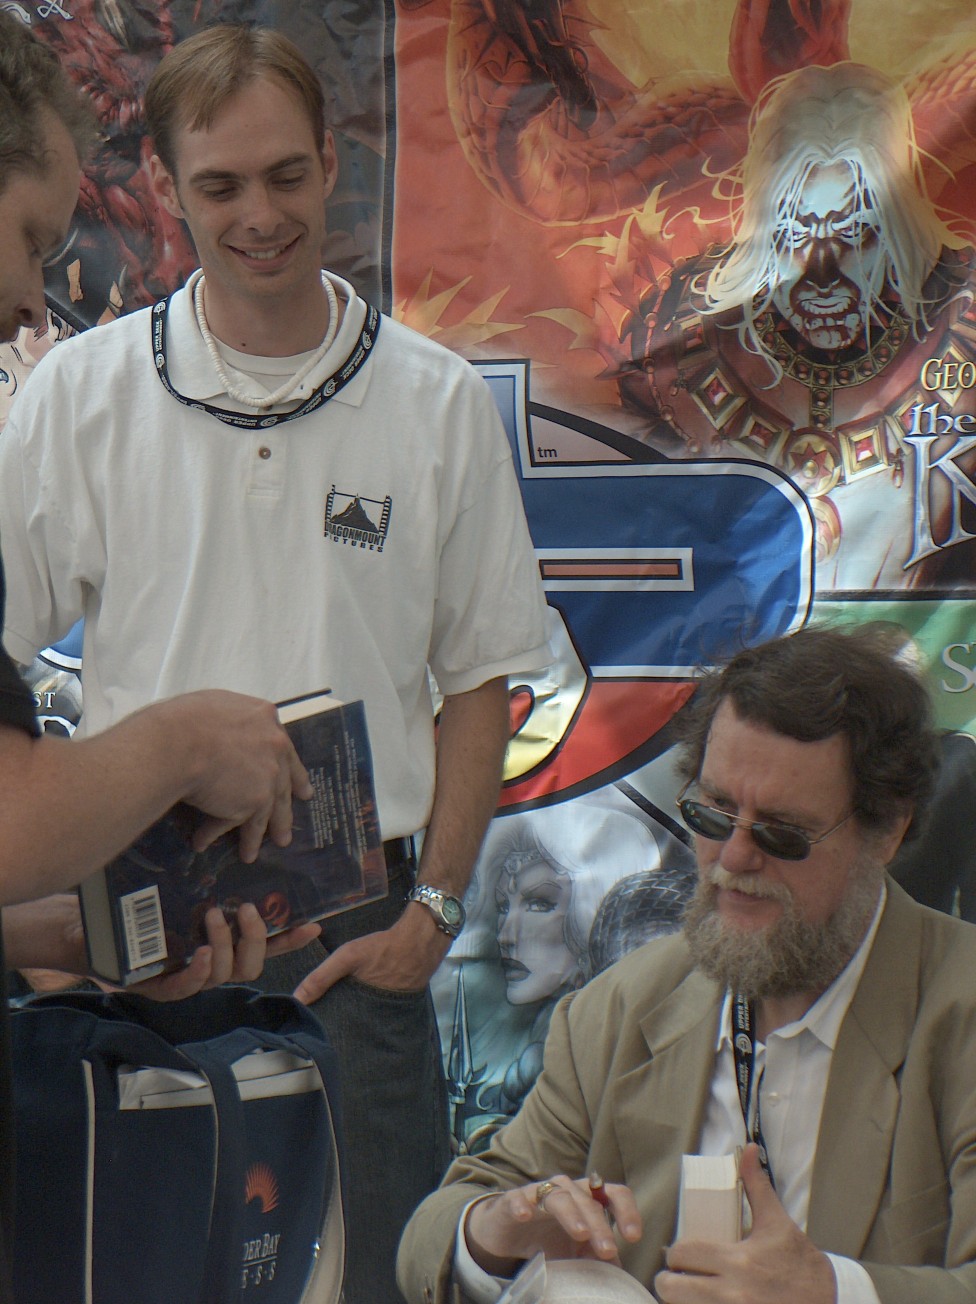

Today, September 19, 2017 marks 19 years of Dragonmount being online. Every year, Jenn and I debate what the exact launch day was, but she’s adamant that Sept 19 is the correct one. I believe her, because, well, one of the biggest lessons I’ve learned over the last 19 years is that I should listen to what Jenn says. So today it is. So what’s happening with DM these days? Well, judging from the slow-moving news on the front page, not a whole lot. But don’t let that fool you. We’re currently working on a major website upgrade: everything from the forums to the news page to the ebook store will be modernized and polished. Yes, that also means we’ll finally have a mobile-friendly version of the site because it’s 2017 now, and not, say, 1998. While the books are complete, I still adamantly maintain that the Wheel of Time franchise is alive and thriving. Not only is JordanCon getting bigger every year, but there are still millions of fans out there who love this saga, and those numbers will only continue to grow as the books are passed onto new readers. Sony’s upcoming TV show will breathe new life into the series, and with it will come a flood of new friends to our community. Administering DM for the past 19 years has been a remarkable experience in my life. Not only did it lead me to this wonderful community of fans, but it helped me launch my own writing career. There’s so much that needs to be said, but I’m going to save it for next year. We have some big events planned for our 20th anniversary. Not only will we have a fresh-looking website, but we’re planning to have at least one, but maybe two real-life parties that you can attend. We’re still trying to figure it all out, but if all goes well, we’ll have a party at JordanCon in Atlanta this coming April (Jenn runs the convention and I’m this year’s Author Guest of Honor), and possibly a second event in California near where I live. Details to come, but please, keep us in mind for next year. This week also marks the 10 year anniversary of Robert Jordan’s passing. He died on September 16th, 2007. I’ve always found it interesting that the calendar dates of DM’s birth and RJ’s death are so close. Time is a wheel, right? Endings and beginnings, round and round they go. Brandon Sanderson wrote a lovely tribute on the anniversary of RJ’s passing. I’m glad he did because he’s the right person to do that. But I was silent on the day for a few reasons. I wanted to sort my thoughts. To illustrate, let me tell you a story. That morning, Saturday, I went hiking in Point Reyes, just north of San Francisco with my girlfriend and some of her co-workers. On the drive up there, we listened to the ending of the Winter’s Heart audiobook, because that’s currently where she is in her first read-through of the books. When we finished, she gave me all her theories and asked a million questions about what had just happened. We talked about everything from resurrected Forsaken to the differences between saidin and saidar for nearly an hour. Later at the hike, during a casual get-to-know-you conversation, I learned another member of our group had just started reading The Eye of the World for the first time. She loved what she’d read so far and was excited to see where the series would go. This young lady and her boyfriend were huge fans of Brandon’s books, so she’d recently decided to give Robert Jordan a try. These conversations underscored to me just how loved these books are. I can’t think of a better legacy for Robert Jordan’s writing career. On the anniversary of his passing, I found myself having two completely unrelated conversations about his books. My hunch is that in another 10 years (or another 20!), people will still be discussing and debating it. Later that day, after my hike, I called Wilson, RJ’s cousin/brother. Wilson was, as many of you know, the liaison between RJ’s family and our community of fans during those hard days 10 years ago. He was the one who called me that day and said, “We lost him, Jason.” He was the one who invited me to Charleston where I met the family and attended the funeral. I called him because it was the anniversary of the death of his cousin, whom he called a brother. I called him because while fans remember Robert Jordan, Wilson and the rest of the family were remembering their loved one, Jim. The world lost more than just a fabulous writer that day. It lost a great guy who liked to fish and sing Elvis songs. I heard him sing Elivis once. But once again, I’ll save some of that story for next year. Because as awesome as it is to be online for 19 years, 20 is the milestone we’re going to celebrate like crazy. See you then. Thanks for sticking around. Jason Denzel (aka the skinny, beardless kid with hair in that photo)
This edition of “Fantasy Review” may be a bit unorthodox. I wanted to cover Renewal, the new anthology released by Queer Sci-Fi and Mischief Corner Books. The two team up once a year to host a flash fiction contest (300 words or less). Of all the submissions, only 110 were selected for publication. And of those chosen, three placement awards were given out, a judge’s choice for each of the five judges, and twenty-five honorable mentions. Since discussing all 110 entries would be nearly impossible, I narrowed my focus to the winners and judge’s choice recipients. A brief synopsis: First Place Winner “Mating Season” by Steve Fuson A tale of resignation and then realization. A young female repulsed by the opposite sex is given a son, and through this bond sees how precious a treasure a child is. Second Place Winner “In a Bind” by SR Jones Out in space, solutions get creative. A human pilot creates an unorthodox playpen for a bunch of alien eggs. Third Place Winner “Urban Renewal” by Siri Paulson Changing things, for better or worse. Sikander's home is scheduled for a renewal. Unbeknown to him, it's also a renewal of his life. Judge’s Choice Recipients: “Bluebonnets” by Emily Horner A futuristic Johnny Appleseed. In a post-apocalyptic world, a woman seeks the blue wildflowers her girlfriend always spoke of. Though love may be lost, the seeds planted along the way still bloom. “ARC” by ER Zhang The line at the DMV is always long. In the distant future, an alien shapeshifter needs to renew its visa. Unfortunately, to do so it needs a new ARC card. After hours of waiting and dozens of papers, revealing its true form may be its salvation. “The Wrong Daughter” by Robyn Walker The black sheep of the family. In a world where the "bad" children are left in the borderlands, Mary's daughter Annabelle is just shy of that point. But when Annabelle comes carrying tales about her sister, Alice, Mary wonders who the bad one really is. “Love Rituals” by Elsa M León A lovesick witch seeks a demon. After unsuccessfully trying to summon a demon with a spell, a witch's crocodile familiar pokes fun at its mistress's unlikely crush. “The Dust” by A.M. Soto The Earth is dry. Meg’s childhood memory of snow and rain are awoken when she spots a cloud in the sky. My take: Of these eight stories, I enjoyed “The Wrong Daughter” the most. Featured in the anthology’s science fiction section, I’d compare it to a horror tale as well. It’s got just a bit of that hair-tingling terror that made me wish the story was longer. The character development of Annabelle is expertly done in the allotted length. For suburb settings, “Love Rituals” was amazing. The witch and her crocodile familiar live in the bayou, and the crocodile’s words elicit that soft, southern dialect to echo in your head. The familiar itself is quite a hook; I’d be fascinated to read more fantasy stories set in such locations. “Bluebonnets,” while post-apocalyptic, was still a beautiful romance. It spoke of hope even though the world was falling apart around her, and lasting emotions despite the fact the love had diminished. And “ARC” was familiar in its anecdote (the common runaround seen at the DMV), but still so great to see from an alien’s perspective. A nice comical break and another story I wanted to read more of. The anthology is an amazing collection of works, ranging from sci-fi and fantasy to paranormal and horror. There’s something in here for everyone, and since it takes only a minute to read each story, you’ll keep going and going. On a side note, my own addition, “Springtime Fae,” was awarded an honorable mention! The Renewal anthology is available now in print and eBook formats.

Earlier this year, the classic anime Sailor Moon had a theatrical rerelease of the first film Sailor Moon R: The Promise of a Rose. Sailor Moon was my favorite anime when I was growing up, and I would wake up at 5:30am on weekdays to catch the episodes playing on the WB before school. When I found out the movie was going to be shown on the big screen, I knew I had to see it with my friend Jessica. And I never like to go to these sorts of events empty handed. I looked high and low for my original Moon Rod, but I seem to have lost it at some point over the years. That left making one. I will preface this with the admission that I was rushed on this project and only used items on hand—I couldn’t justify spending extra money on making a Sailor Moon themed wand. Sometimes being an adult sucks. So, with that said, this was not my best work. I wish I had a few more days and a few more dollars. But, it still turned out good enough to tag along to the show. For materials I used aluminum foil, a metal rod for holding down tents, clay, and paint. First, I wrapped aluminum foil around the metal rod to make the handle. After that, I crafted a crescent moon for the top, and a ball for the Silver Imperium Crystal. I attached them all together. Then I covered the handle with pink clay. I used yellow for the crescent until I ran out and then had to add white. I covered the ball with white. I cooked the whole thing according to the directions. Once it cooled (I did all this in one afternoon, the day before the show), I painted each section. I went over the handle with a glossy pink, the yellow to cover up the white spots on the crescent, and the crystal a metallic silver with black lines to symbolize it’s many sides. For finishing touches, I hot glued the band around the bottom of the crescent and the handle. I painted them white. My Sailor Moon cosplay outfit completed the look. Another moviegoer was in a Sailor Moon inspired kimono and looked gorgeous! If they rerelease anymore, I’ll have to make a Princess Serenity outfit. Or I can make that just because. Thanks for reading! Next time, I want to show you a super cute Haku plushie I made for the Studio Ghibli Fest—October’s featured film will be Spirited Away!

<p>Welcome back to the <em>Dragonmount </em>"Forum Roundup!"<img src="http://www.dragonmount.com/forums/uploads/gallery/album_412/gallery_21251_412_5941.png" alt="gallery_21251_412_5941.png">As school begins and as we say goodbye to summer, my hopes are that all of your wishes and plans were fulfilled.I went to the coast recently and I was able to pick up the 2016 edition of <em><a data-ipb='nomediaparse' href='http://www.dragonmount.com/Books/Eye_of_the_World/index.php' class="bbc_url" title="">Eye of the World!</a></em> It is beautiful!<img src="http://www.dragonmount.com/forums/uploads/gallery/album_412/gallery_21251_412_21293.jpg" alt="gallery_21251_412_21293.jpg"><img src="http://www.dragonmount.com/forums/uploads/gallery/album_412/gallery_21251_412_33571.png" alt="gallery_21251_412_33571.png">The edge of the pages are gold and there is an attached blue ribbon bookmark. Do you suppose that the whole<em> Wheel of Time</em> series will be republished in this style? I sure hope so. Finding this book on my mini vacation made the whole summer worthwhile.I've also started a re-read of the <em>Wheel of Time. </em>The Brown Ajah of the<a data-ipb='nomediaparse' href='http://www.dragonmount.com/forums/forum/33-the-white-tower-warders-social-group/' class="bbc_url" title=""> White Tower and Warders</a> are hosting. I came upon the series in 2010 (rather late) and have re-read my favorite books and parts of the series. This will be the first time ever that I'm re-reading in order. I found <em><a data-ipb='nomediaparse' href='http://www.dragonmount.com/Books/New_Spring/index.php' class="bbc_url" title="">A New Spring</a></em> best read after <a data-ipb='nomediaparse' href='http://www.dragonmount.com/Books/Dragon_Reborn/index.php' class="bbc_url" title=""><em>The Dragon Reborn.</em></a> I've just started that book. Yes, it seems as if the characters are old friends. However, the world of <em>The Wheel of Time</em> is so complex, there is something new every page.It's amazing how these books have brought us all together. We've celebrated the writing of <strong>Robert Jordan, </strong>mourned his passing, and waited for the completion of the series by <strong>Brandon Sanderson.</strong>Now, our excitement is directed towards a television series. The series can't come fast enough for me.In the time being, we can all meet up here, continue with our love of the <em>Wheel of Time</em> world and honor Robert Jordan's memory by keeping his creation alive.</p>

This month’s “Fantasy Review” is Deadmen Walking, by Sherrilyn Kenyon. A swashbuckler tale, with a hefty dose of romance and comedy, this book was a lot different than I expected. Slight spoilers below. Synopsis: Cameron Jack’s brother was killed when his ship sank off the shore of Cape Canaveral, Florida. However, she received a letter—and a trinket—from him dated weeks after he was supposedly dead. Taking the advice of a witch, Cameron seeks out Devyl Bane, feared captain of a crew of Deadmen—souls damned and freed from hell to fight evil in the human realm. Cameron’s brother is being held by an evil Vanir, who also happens to be Devyl Bane’s ex-wife—their marriage ended when she cut out his heart centuries ago. Cameron and Captain Bane, along with a hodge-podge crew of murderers and scoundrels, seek to find a way to free Cameron’s brother from the hands of his captors. The Jack family, being descendants of Michael—the Archangel—allows their blood is able to open the gates of hell and release all the demons lurking within. Pros: This story is stuffed full with every sort of mythology. Mermen. Seraph and fallen angels. A servant of the Greek gods. Vanir and Aesir. Jinn-like men who keep their souls in whisky bottles. Ghede Nibo, the leader of dead spirits. Dragons and sea monsters. And more. The world Kenyon inhabits is vibrant with its characters and its settings. A history buff would better understand all the underlying relationships and oppositions of these sometimes-warring, sometimes-allied peoples, but even without such knowledge, it’s still easy enough to follow. The plot is thick, and though a bit predictable at times, the pace is quick and engaging. The characters—and the story boasts many of them—are complex, unique, and interesting. Each of the Deadmen come with tragic backstories which explains their motives for wanting redemption. The romance was the most surprising aspect of the tale. Without going into too much detail, I expected Cameron to be the object of the captain’s affection—with her innocence and part-Seraph heritage to provide the nice contrast to Bane’s brooding, damned soul. But, the two are not fated to be together, and the romance that blooms instead is a lot more fulfilling. Cons: As a personal preference, I don’t particularly care to read third-person omniscient. It’s very difficult to do correctly. Some authors have succeeded (see Frank Herbert’s Dune for an excellent example) but most I try to read in this format fail utterly. Kenyon pulls it off pretty well, but it’s still not my favorite style. Not necessarily a con, but something that was contrary to my expectations, was the lack of grittiness. Thinking this a tale of pirates, demons breaking free from hell, and a ship full of sinners, I thought it would be a bit rougher. The voice Kenyon used was almost poetic, which was a contrast to the theme of death and damnation. Conclusion: This story was fascinating, full of fleshed out characters, detailed settings, engaging mythology, and a beautiful romance. Though not my typical read, I still enjoyed this. The plot didn’t offer much in the way of new material, but the characters were endearing enough I would have loved to read about them sitting around to eat dinner. Their banter was charming and so natural, and their friendships were touching and sweet. This book was a lot of fun and definitely worth a read. Rating: 4 out of 5 If you’re interested in a copy of this eBook, check out Dragonmount’s DRM-free eBook store!

Welcome back to another exciting edition of "Fandom Flair." I couldn't wait to have an opportunity to show off the Yuri on Ice cosplay outfit I put together for the Phoenix Comicon in May! For those who aren't aware, Yuri on Ice is an anime that features Katsuki Yuuri, a Japanese figure skater. After coming in last place in the Grand Prix Finals, he contemplates retirement. But then his idol, and five-time World Champion, Victor Nikiforov, shows up and offers to be Yuuri's coach. It's a delightful anime, full of humor, romance, and beautiful skating routines. The show has been discussed in great deal because the romance between Yuuri and Victor is incredibly well done. Yuuri also suffers from anxiety, and much of the show focuses on how he--and his family and friends--deal with it. Also, there's a great amount of diversity in the characters. Victor--and his young protege, Yuri Plisetsky--are Russian. There are also skaters from Canada, Thailand, Switzerland, and Kazakhstan. There are so many aspects of this show to love. But I should move on, or I will simply gush forever. In the season finale, one of the skaters, Phichit Chulanont from Thailand, thinks about his dream of having an ice show, to show the people of Thailand how fun skating can be. He imagines all his skating friends in costume with him. It's a lovey scene, and it shows how optimistic and bright a character Phichit is. The costume Phichit wears is elaborate, and I've seen cosplays of it already. I was more drawn to the other skaters' costumes, and the adorable hamster hats they wear. The first thing I did was make the hat. I did this the day after the season finale because I couldn't get over how cute the hamsters were. And since it was December, I had plenty of opportunities to wear it outdoors to keep my ears warm. I started with this tutorial on how to make a fleece hat. I've used this pattern countless times and could do it in my sleep. I cut it out of brown fleece, then trimmed about three inches off the bottom. I cut out a white fleece, about five inches, and sewed it to the bottom. Next, I worked on the ears. I made them rounded, and cut them from the same brown fleece. I also added a smaller white circle to the center for contrast. I sewed them together with a blanket stitch. I folded both ears and placed them face down on the bottom piece of the hat. I sewed the matching top piece over (right side to right side). So when flipped, the ears stuck out at an angle. I stitched up the V at the top, then folded the white bottom up two times to give me a puffy brim. I cut out a small strip of white fleece and sewed a line through the center for teeth. I also cut out a nose, eyes, and eye glimmers. I hot glued all these accents on, since my fabric was too thick to sew through. I also added just a bit of hot glue around the brim so it would stay up. Now, for the rest of the costume. The skaters wore two different outfits, and while I'd loved to make the one with the ruffles, I don't think my sewing skills are at that level. So I went with the striped happi instead. I looked online and found a simple happi pattern. What made it not easy is that I could not find any fabrics with wide blue and yellow stripes. My dedication to authenticity reached a new height, so I decided to buy plain cotton fabrics in both colors, cut them on a diagonal, and sew them together. This was very, very time consuming. But I loved the end results. Totally worth it. After that, I simply cut out the front two pieces, and the back piece. I sewed them together and hemmed the bottom. Next, I added on the pink collar. I also used a bit of the pink to finish the hem on the sleeves. With the little I had left over, I made a thin belt. (It was crunch time by this point so I didn't get pictures of the last few steps.) I paired the happi with a long-sleeved white shirt and white leggings. I loved this cosplay. It's pretty obscure, because it's only shown during a ten second scene, but I enjoy the moment it represents. Phichit is one of my favorite characters on the show and I was happy to include something from his dream into my cosplay repertoire. Thanks for reading!

Welcome back! Many of us are moving into a scorching summer. I hope that wherever you are, you manage to stay on an even keel, temperature wise. What I wouldn't give for an ice cold lake at this moment! Robert Jordan once said, "I live in the Two Rivers. Check a map." His hometown, Charleston, South Carolina, nestles in the fork of the Cooper and and Ashley Rivers. Did you ever feel like you lived there? Robert Jordan's words were so descriptive, I felt as if I could just move into the picture he created by his words. I live close to Three Rivers, California. Three Rivers is near the entrance to the Sequoia and Kings Canyon National Parks. Dragonmount in June! We continue to gain both new readers and old members. Welcome to all!! I really need to mention that we have some fantastic Dragonmount signature artists. Ask and you shall receive. Recently, I was gifted with a very beautiful signature by one of our members. We continue to receive updates on our "Realistic Wheel of Time Collages -A Picture is Worth a Thousand Words." If you like to create the AWC Tuathan'an Camp is for you. The Dragon Reborn Role Play has added additional writers/characters and story lines. Come join if you would like to create your own character within a Wheel of Time setting. The Black Tower is busy with Mafia! Shayol Ghul is on an assignment to spread as much evil as they can. They also entertain themselves with mafia and other games. The Aiel are discussing summer plans, and the perception of beauty. There are some fun games to join. The Kin are hosting a monthly discussion on animals and the various way we interact with them. A quiz is available to see which pet is right for you! The White Tower and Warders have Aspiriants on both paths, "The Way of the Warder" and The Way of the Aes Sedai." The Band of the Red Hand is active with multiple "pool parties" and have a new "Hornsounder" Edition. See you next month!

Welcome back to another edition of “Fandom Flair.” For this week, I want to share a project I had planned for JordanCon9. Meridian and I had talked about doing a sul’dam/damane duo for the costume contest. Unfortunately, neither of us could make it to the convention this year. So my half-finished dress stayed in limbo, until I realized I could wear it to the Phoenix Comicon, which was the last week of May. First, a note on canon sources. This is the cover of New Weaves in the Pattern, part two of The Great Hunt when it was broken into pieces for a YA audience. And this is official artwork from Ariel Burgess. I love both these pieces and used a bit from each to compose my dress. For materials, I started with two yards each of a red poplin and a blue poplin. Poplin is a wonderful, durable fabric. It's great for heavy dresses or cloaks (we did a Harry Potter cloak here.) On the downside, it's very hot. Not a material you want to wear in warm temperatures. I also bought a yard of thin, silver silk. This was for the added lightning bolts. I needed a whole yard since I had to double up the fabric to make it thick enough to stick to the fabric adhesive. For the pattern, I used the same one as my Aes Sedai dress. The pieces were already cut to the correct size, and it was a design I was comfortable with. I did have to get creative when dealing with the color split. I decided to make the back and sleeves blue, and cut the front panels in half with alternating colors. The front panel was red on top and blue on the bottom, and the two side panels were blue in top and red on the bottom. Next I bought double sided iron-on fabric adhesive to bind to the silver silk. Then I drew a lightning bolt on the back, cut it out (wasting a lot of fabric and glue), and then ironed the other side to my dress. With the help of my mom, I measured the length and hemmed the bottom. Then I made larger, longer lightning bolts for the two red side panel (even more wasted fabric and adhesive). My waist lines were wonky, so I made an obi belt to hide them (I followed this tutorial). I actually really like the added belt because it mimics one of the design aspects in Ariel’s artwork and gives more definition to the dress. (And here's my beautiful damane. I made a miniature dress for the sole purpose of dressing up my dog….) For the a’dam, I had trouble. As I said, this was for a large, crowded convention. Safety had to be my number one priority. Any item connected to a person’s neck had to be able to come off with the slightest pressure. The eventual answer to this was magnets (I tried other methods first, but I'm too embarrassed to discuss them). I bought a 72” linking chain from Wal-Mart, for less than $4. It was constructed of tiny, four sided, rounded cubes that connected to each other with prongs. It was easy to remove the link by pulling the prongs loose with pliers. I measure my wrist and removed a section that length. Same with my neck measurement. I used 7mm jump rings to connect metal clasps to both ends. Finally, I connected the rest of the chain (still probably 50” long) to both the necklace and the bracelet. It turned out beautiful! And the magnetic clasps came off very easily. I had so much fun at the convention! I even caught myself a damane! And I ran into this adorable Mistborn cosplayer. That's all for now. Next time, I show the other outfit I wore to the Phoenix Comicon. (Here's a hint… it has to do with Yuri on Ice.) Thanks for reading!
-
Stay Connected


-
-
-
Support Dragonmount Get exclusive content on our Patreon. Don't miss out.
-
-
Upcoming Events